Drop a blue sky into a cloudy photo and the house often still looks like it's sitting under cloud. The sky has changed, but the siding, lawn and roof are lit the same flat way. Sunlit changes the light across the whole photo. Look at the shadows under the eaves and across the grass and you'll see the difference.
In this guide
A sunny image is more than a blue sky
A sky replacement can be enough if the light on the house already looks right. If the walls, grass and trees are still lit by flat cloud, a bright new sky just looks pasted on.
After an overcast shoot at waterfront properties, I replaced the clouds with a blue sky. The water stayed flat and grey. The new sky looked disconnected from the rest of the photo, and the client asked for a reshoot.
That job made the limitation of a sky-only edit clear to me. Water, landscaping and the light on the building need attention too. A blue sky on its own does not make the scene look sunny.
Relighting also changes where the light lands on the house and yard. You're looking for brighter walls on the sunny side, proper shade on the other, and reflections that match the new sky.
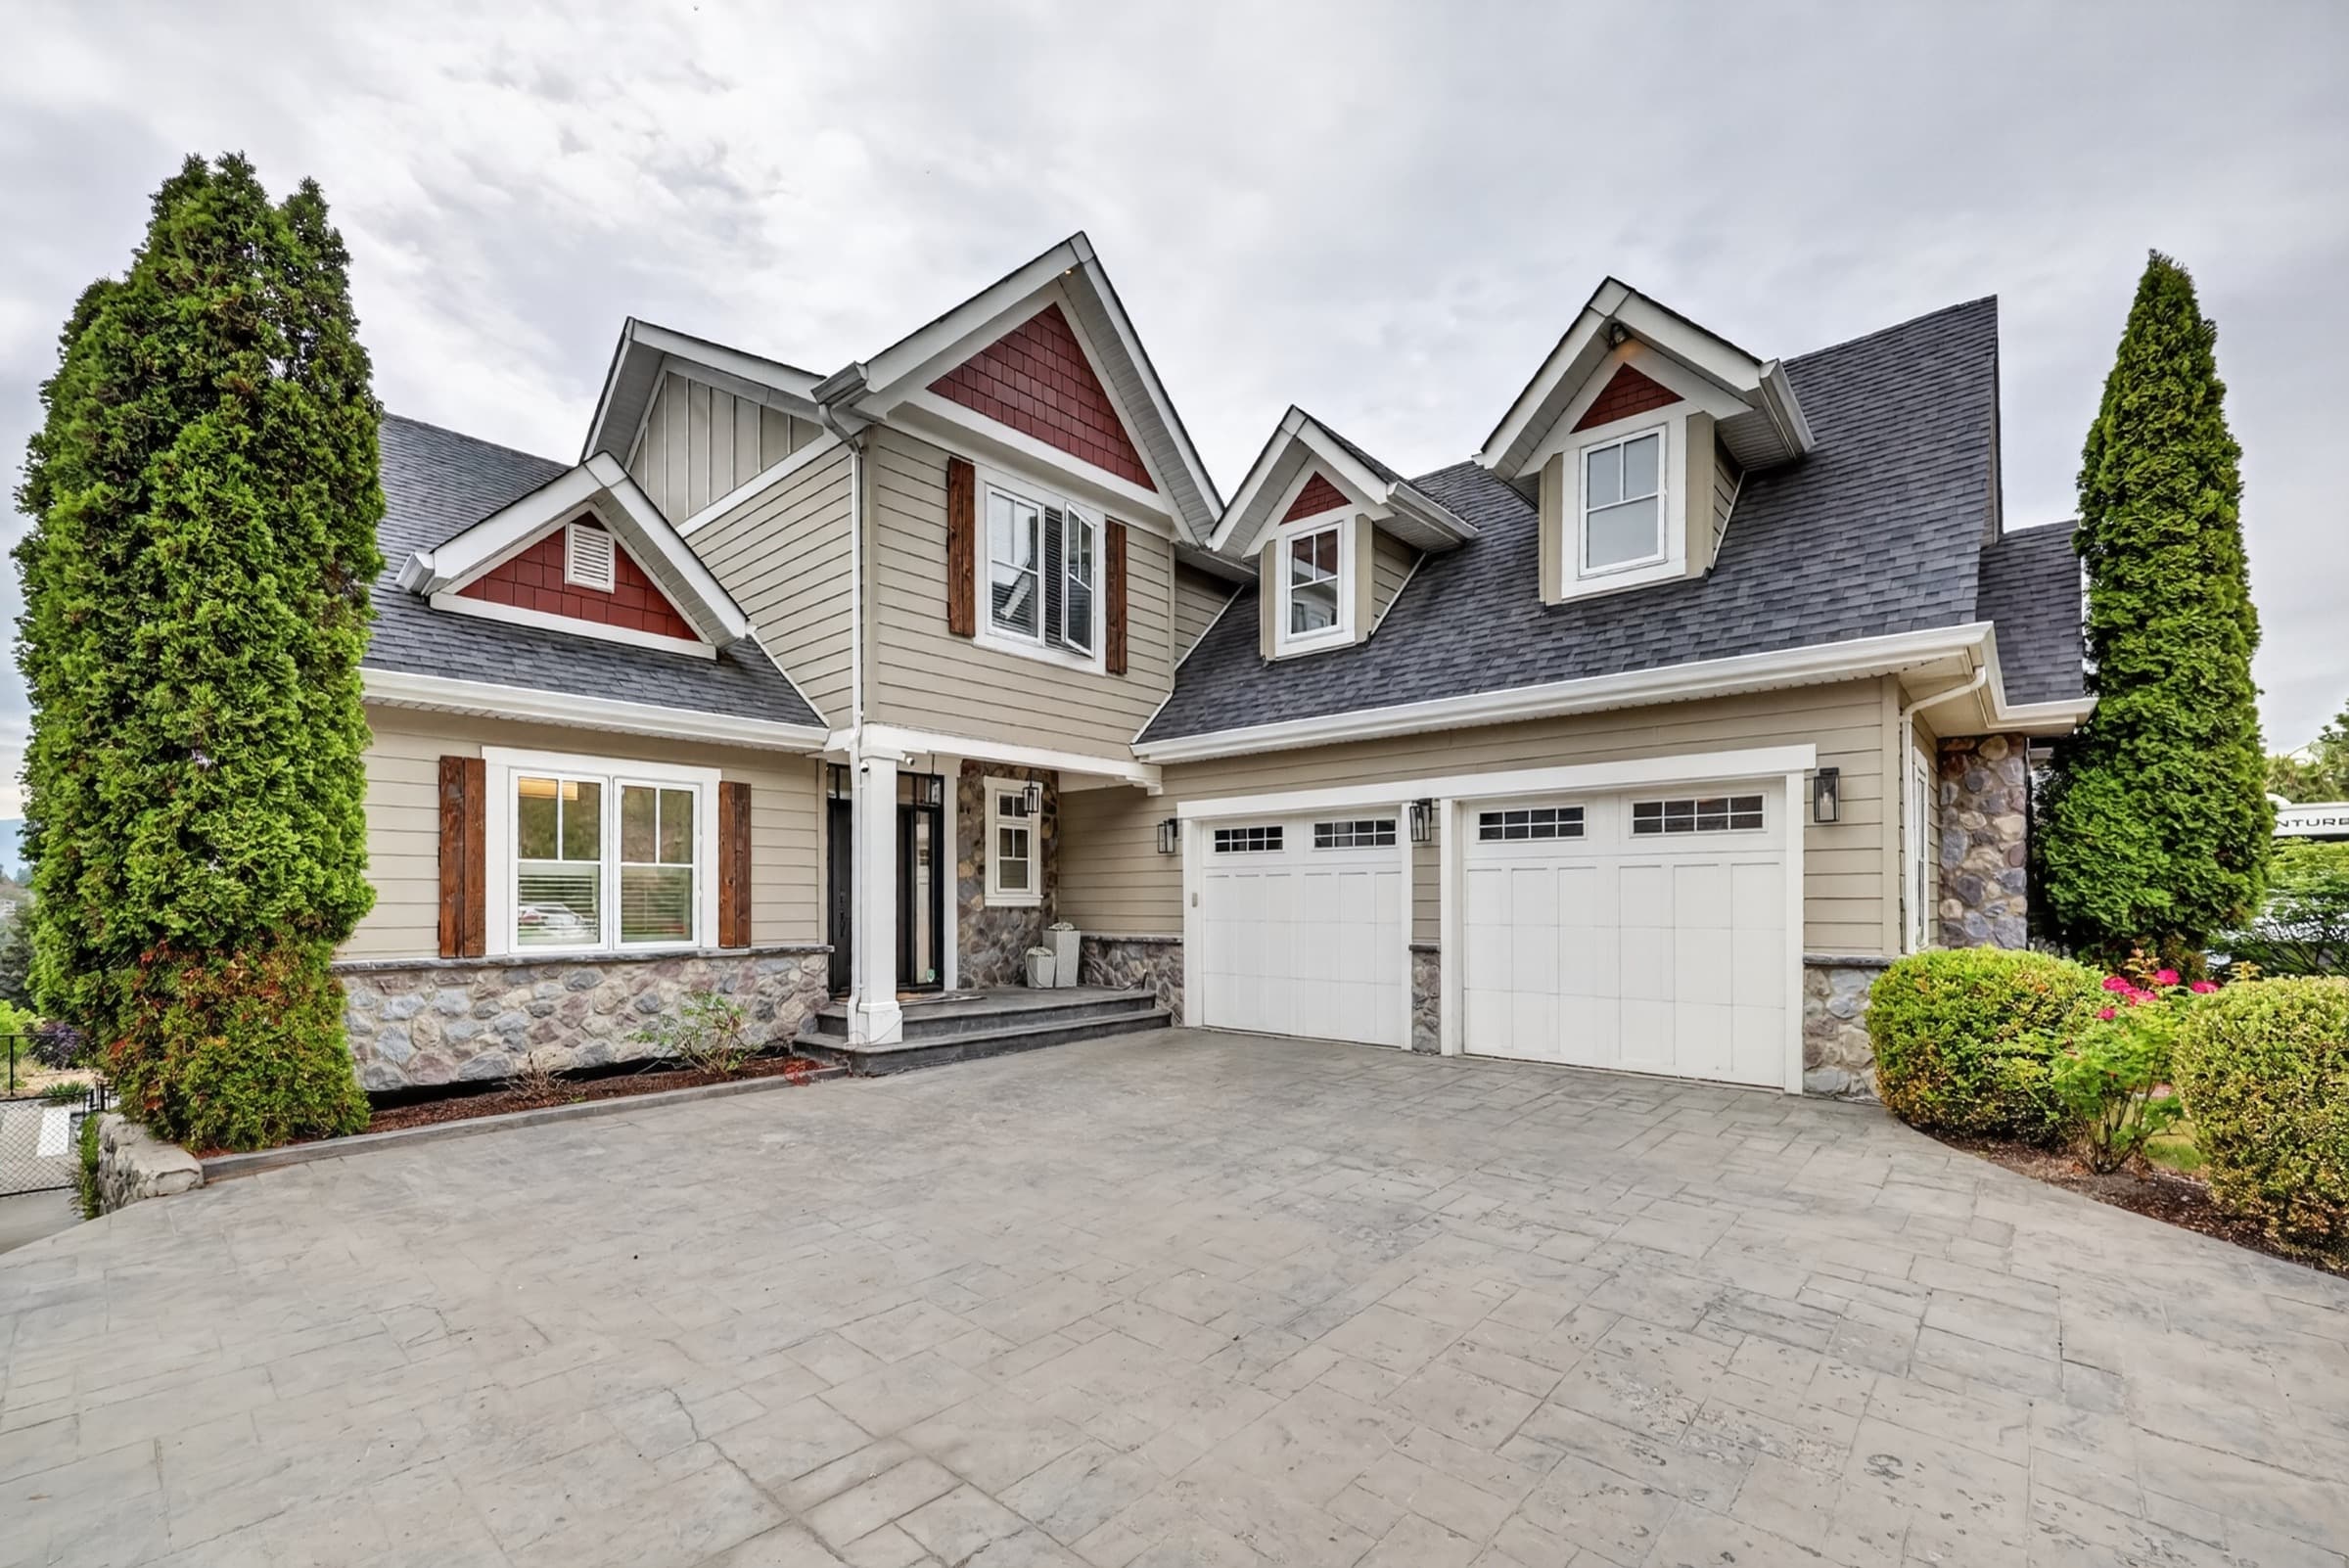
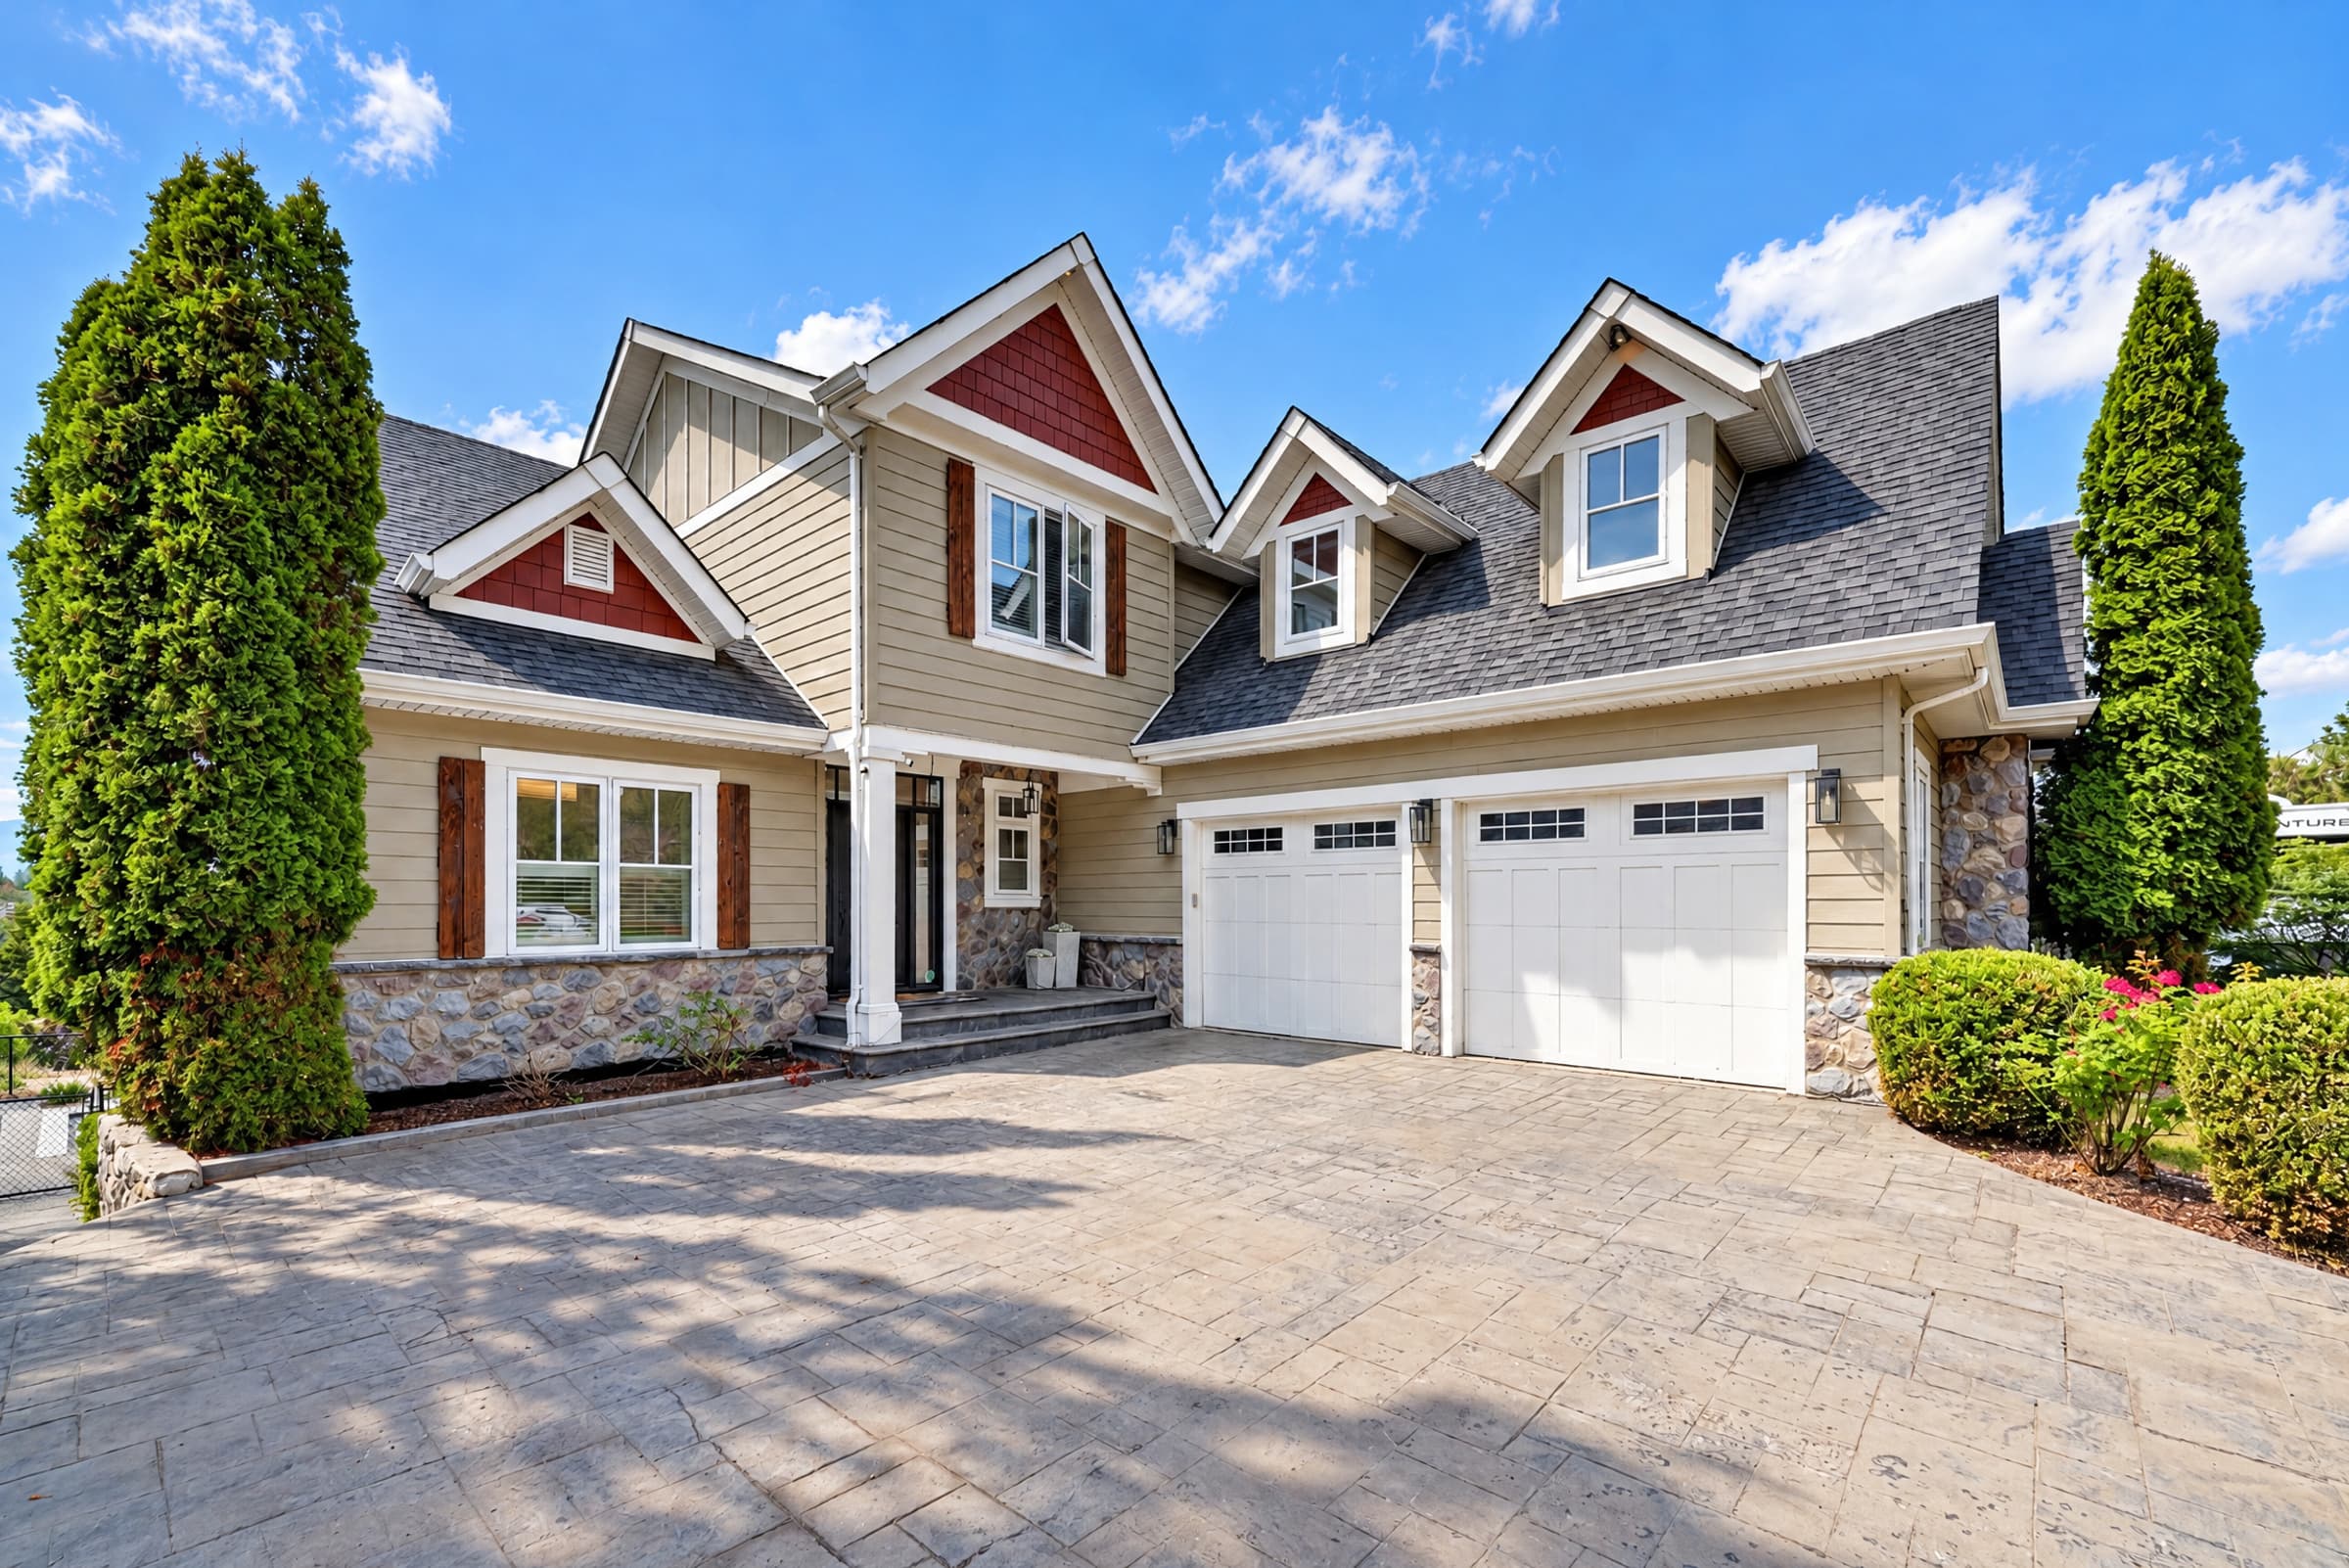
Compare the cloudy original, sky replacement and full Sunlit conversion on the same photograph →
Choose a suitable original
Start with the frame you'd normally deliver. Straight verticals, sharp focus, clear detail on the house and a sensible exposure matter far more than dramatic clouds. Flat overcast light actually helps, because the important surfaces stay readable and nothing is blown out.
You can read the front of the house, the roofline is clean, the plants look natural, the highlights are under control, and no bad weather is hiding the property.
Fog, rain streaks, snow, blown-out windows, branches blurred by wind, or shadows so deep they already hide detail.
A practical cloudy-to-sunny workflow
- Finish the photo first. Fix lens distortion, verticals, the crop and the basic exposure before you change the weather.
- Relight the whole scene. The sky, the house, the ground, the plants and the shadows all need to change together.
- Keep the season. Don't turn a brown winter lawn into summer grass, or swap in plants that don't grow there, just to make it prettier.
- Protect the facts. Rooflines, windows, doors, railings, paving, signs, power lines and the neighbours' buildings all need to stay recognisable.
- Compare at full size. Flip between the original and the result before you export the client file.
Upload one exterior, run it, and put the result next to your original before you decide whether it goes in the gallery.
The 100% review checklist
- Follow every roofline, gutter, chimney, antenna, railing and power line.
- Count the windows, doors, garage door panels, posts and anything else that repeats.
- Check that all the shadows agree on where the sun is.
- Look at glass, water, shiny cars and metal for reflections that don't match.
- Look through the trees and along fine edges for halos or branches that weren't there.
- Make sure the season, the lawn, the neighbouring houses and the view are still honest.
- Then look at it again at thumbnail size. The house should still be what you notice first.
Explain the edit to your client
What you can honestly offer is simple: a cloudy shoot day no longer has to mean a second trip for a bright exterior. Don't promise that every stormy frame will come out perfect, or that an automated edit never changes a detail. Allow time to review each image, and keep the original with the delivery.
Cloudy-to-sunny editing FAQ
Is cloudy-to-sunny editing the same as a sky replacement?
No. A sky replacement swaps out one part of the photo. For a sunny day to look real, the light has to change everywhere else too: which way it's coming from, the shadows, the reflections, how bright each surface is and its colour.
Which cloudy photos are easiest to relight?
Clean exterior shots taken under flat or light cloud work best. Heavy rain, fog, snow, blown highlights, motion blur or something blocking the house all leave the edit with less to go on.
Can AI keep the property exactly the same?
It's built to keep the house as you photographed it, but generative editing can still change small details. Compare the result with your original at full size before you deliver it.