Take a daylight photo you'd be happy to deliver on its own. Keep the camera level, leave room around the roof and hold detail in the walls and shadows. A twilight edit can change the light, but it can't reliably fix blur or a bad camera angle.
In this guide
Before you shoot: decide what the frame has to do
The edit needs a real photo to work from, so start by deciding what the frame has to show. Sometimes that's the front of the house. Sometimes it's the back garden, the pool, or the room that made the seller want to list in the first place. Decide that before you touch a setting on the camera.
Then make the daylight version worth keeping on its own. Move the bins, wait for the neighbour's car to leave, check the corners of the frame for anything you didn't mean to include, and keep the untouched file when you get home. If the photo doesn't work at noon, it won't work at dusk either.
When the house is furnished, the furniture is part of what you're photographing. Set the room up the way it should be shown, and keep the walkways and architecture clear. Changing the light won't move a chair, bed or table that was in the wrong place when you took the shot.
Pick the view that sells the house, then let the light support it. A dramatic bit of sky isn't worth losing the architecture for.
You still need to be able to read the roofline, windows, doors, garden, access and views. Once the photo's been relit, the original is what you check it against.
Pick the exterior angle before you pick the settings
Walk the property first. You're looking for the one spot where the roofline, the entrance, the best room and a usable piece of sky all line up. Straight on shows the architecture clearly. A three-quarter view gives you depth. A patio or pool angle connects inside and out.
- Keep the subject big: the front, the entry, the outdoor room or the view has to read as a listing thumbnail, not just on your monitor.
- Watch the edges: don't cut off a roof corner, a window, the end of the pool, a railing or the plants framing the house.
- Use the sky on purpose: leave clean space above the outline of the house, and enough ground and foreground to anchor it.
- Move away from a blocked view: parked cars, bins, people, temporary signs and branches across the main lines only get harder to judge once the light changes.
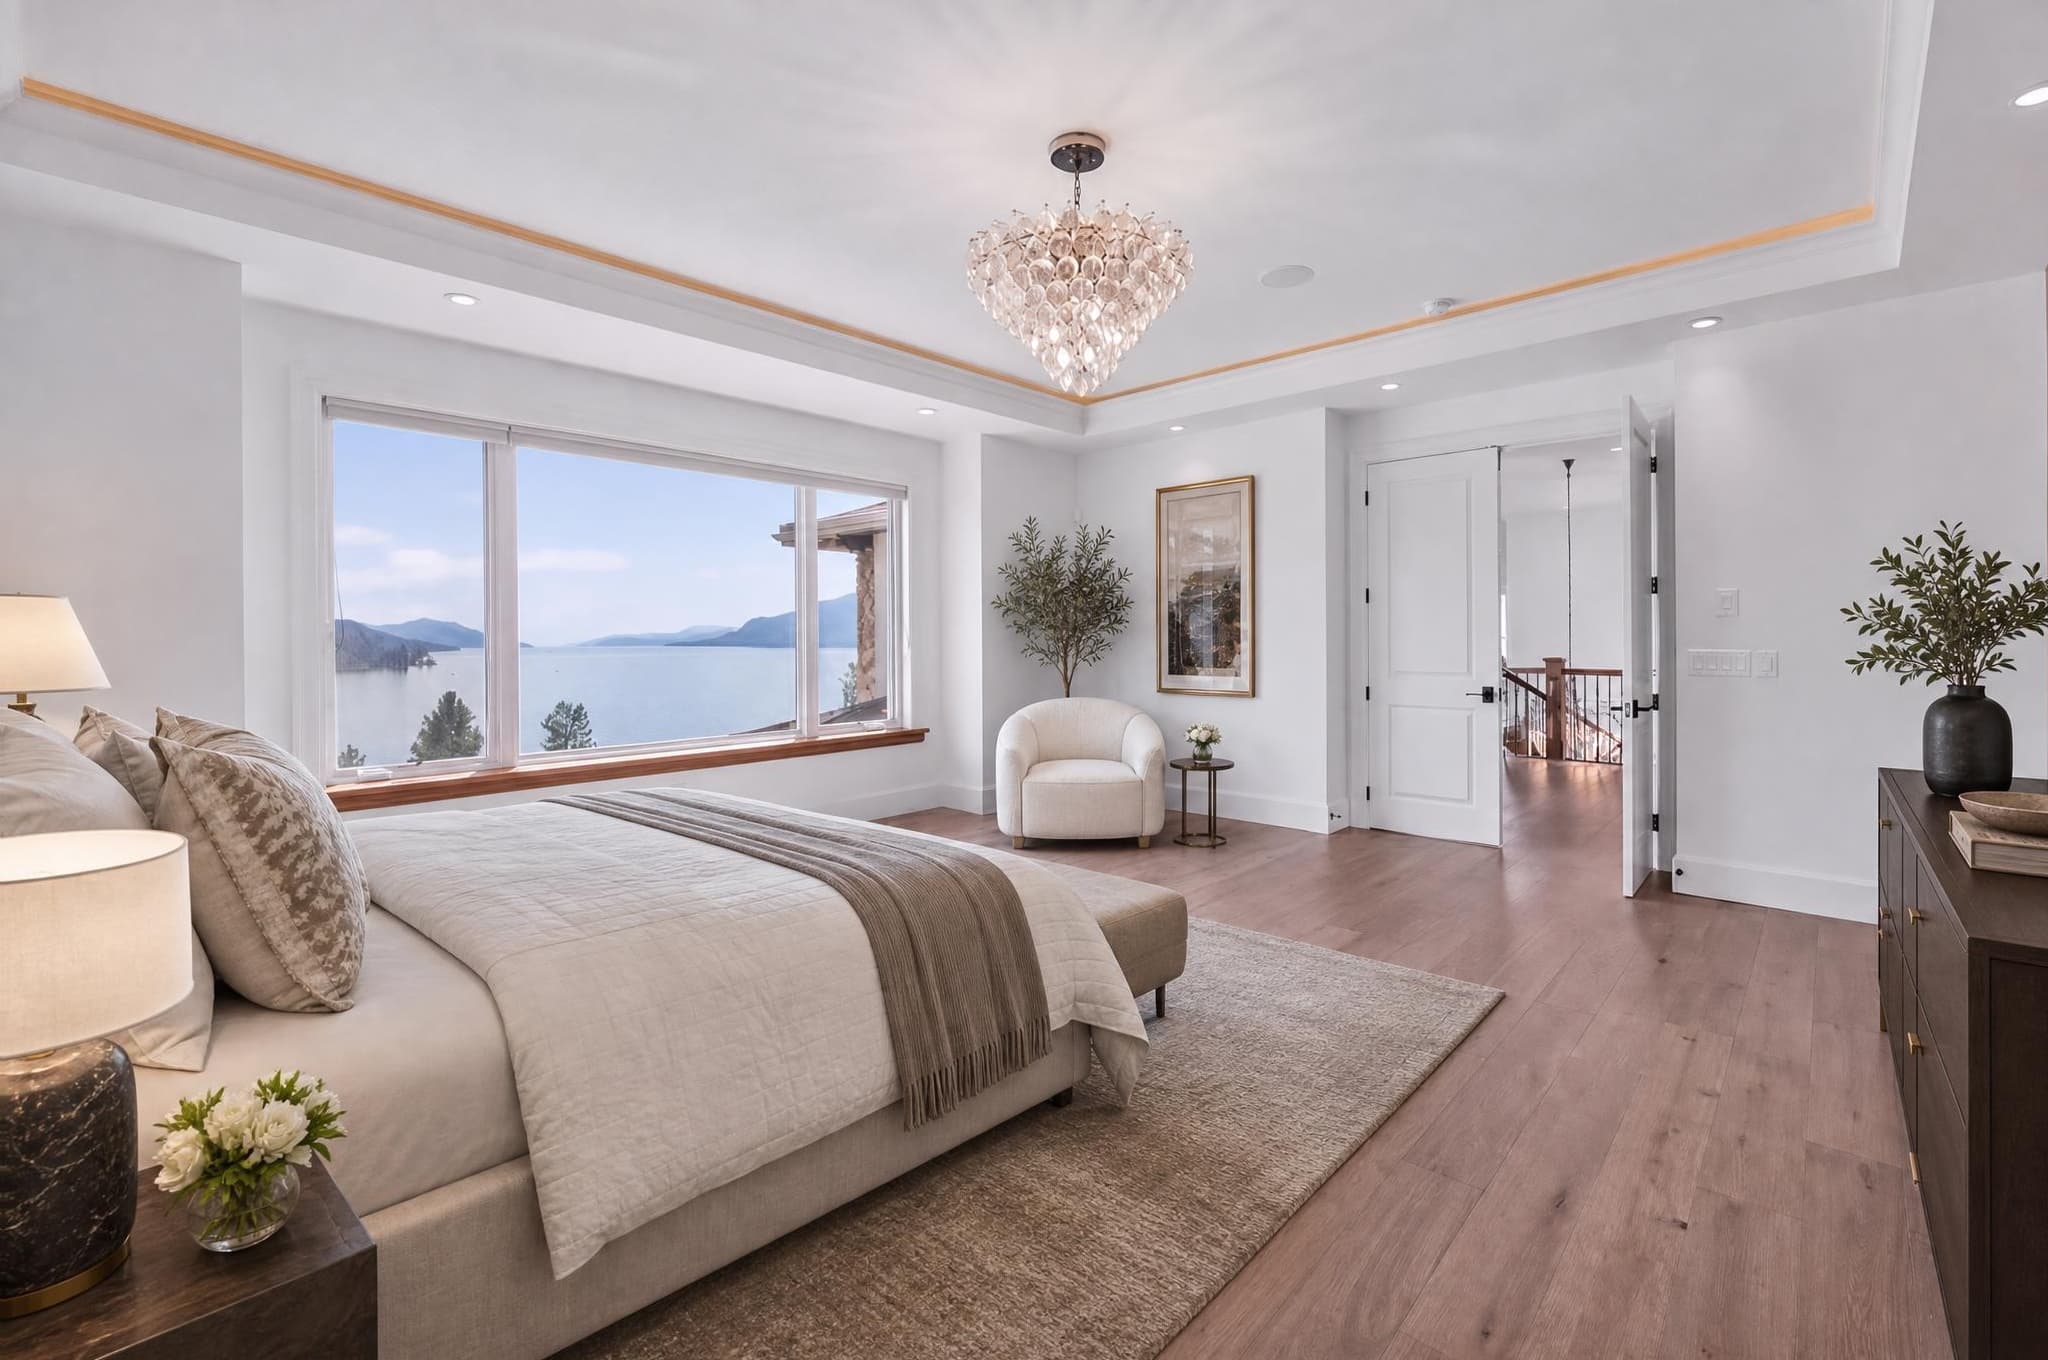
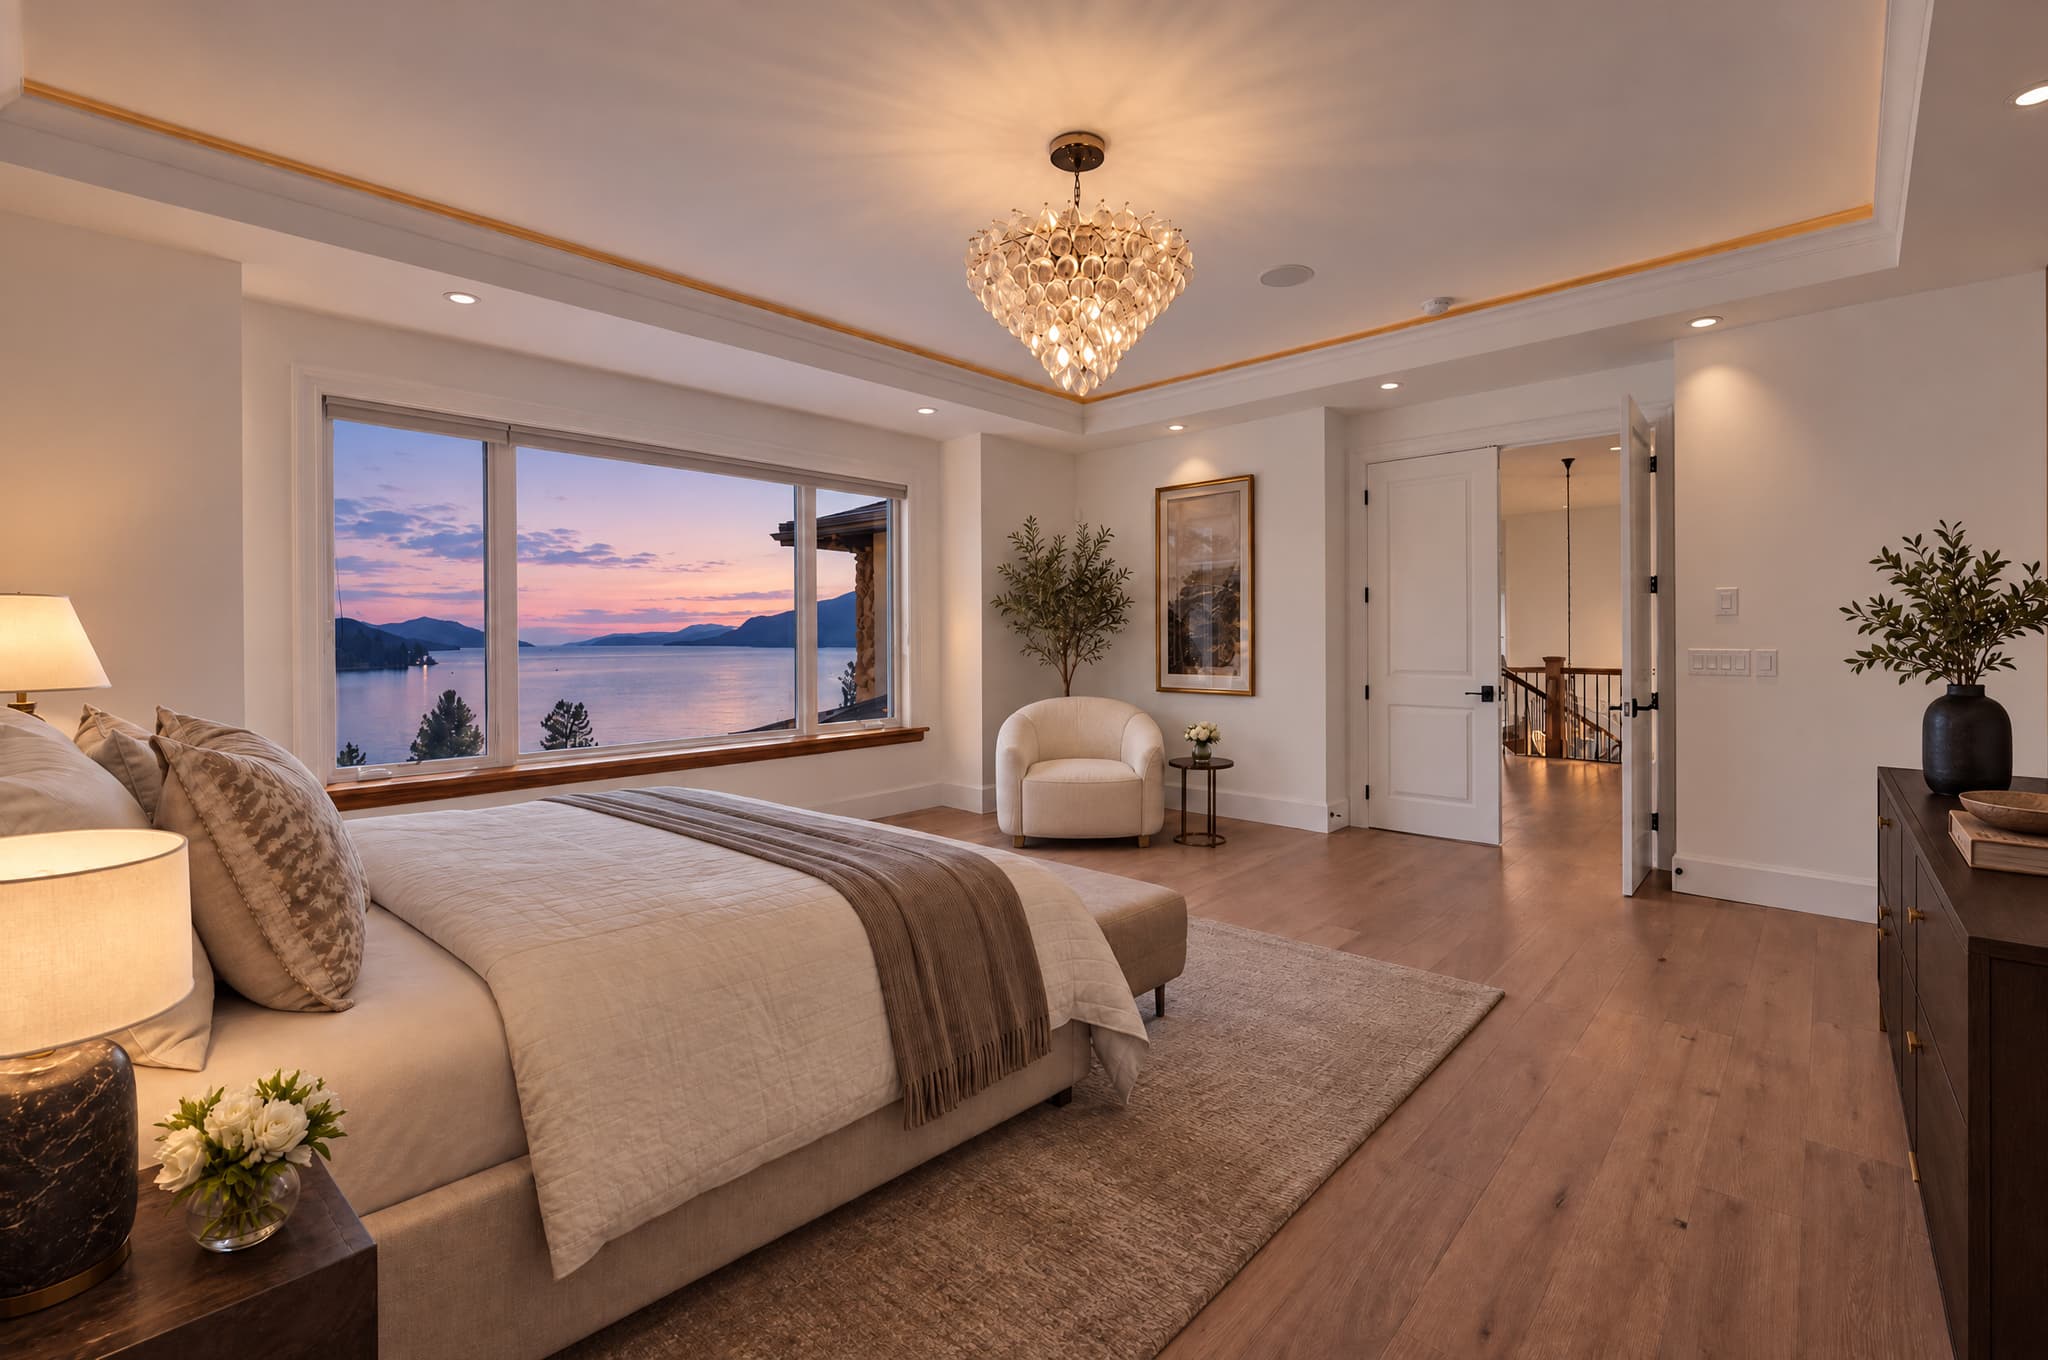
One furnished photo, shown as a before-and-after pair. The live Relight Spaces result changes the time of day and the glow inside. Afterwards, compare the bed, chair, doors, chandelier and lake view.
Set the camera height and keep the verticals honest
Use a tripod when it's practical, and hold the camera at a natural eye level for the room or the front of the house. Level it before you press the shutter. Tilting up to fit a tall house, or down to squeeze in the foreground, bends the verticals, and no amount of evening light will hide a bent wall.
- Level the camera: check the door frames, window frames, porch posts, cabinet edges and stair rails nearest the sides of the frame.
- Leave some breathing room: include enough wall, floor, foreground and sky for the crop you want, without pushing the house so far back it stops being the subject.
- Use the widest view that still looks normal: step back or change focal length before you reach for an ultra-wide that stretches the corners.
- Indoors, shoot from a corner or a doorway: with two walls in the frame, people can read the depth, where the furniture sits and how the openings connect.
- Take a second frame: moving half a metre often gets rid of a reflection or straightens a line that would otherwise need a heavy correction.
Control the light and the exposure
Soft, even daylight is much easier to work with than hard midday sun. Strong sun buries one side of the house in shadow, throws shadows that argue with the evening light, and blows out pale walls beyond saving. If the sun's harsh, move, come back later, or bracket so you've got something to work with.
Expose to protect the highlights you care about without losing the shadow detail you'll need to check later. There's no single shutter speed, aperture or ISO for this, and no set amount to underexpose by. The camera, the weather, the house and the file you're delivering decide it. Shoot RAW when you can. When you can't, export the best JPEG the camera will give you.
| Source condition | Why it matters | What to do |
|---|---|---|
| Hard direct sun | Deep shadows and blown highlights fight the evening light. | Move, wait or bracket. Keep detail at both ends. |
| Interior lights off | The windows and fixtures give the edit nothing real to work from. | Switch on the interior, porch, garden and pool lights when you can. |
| Mixed colour casts | Daylight plus several kinds of bulbs makes the final warmth look accidental. | Keep it consistent, and look at every light you can see. |
Pale walls, the sky, windows and shiny surfaces need some detail left in them. A blown highlight gives you nothing to check.
Porch lamps, pool lights and lights inside the house give the evening version a real source to work from.
Plan for glass, pools and reflections
Reflections are part of the house, not background you can ignore. A window shows how inside and outside relate. A pool carries the sky and whatever's standing near it. Polished stone, cars and metal repeat the same light. Give those surfaces enough resolution, and keep a stray person, branch or hot spot out of the glass.
- Keep the pool edge, waterline, deck and nearby planting in frame when the pool is part of the sale.
- Look through the windows and doors before you shoot. Open the blinds if it suits the room, but don't hide a real view.
- Watch for wind, ripples, glare and reflections you didn't mean to catch. They make the edited sky and the glow of the lights harder to judge.
- After the edit, go back to the glass, water, paving, railings and appliances at full size. Two skies in one frame, a repeated detail or a flat glowing patch: any of those means it's a reject.
Prepare the file before you upload it
Send the biggest clean file you have. Not a screenshot, and not the copy that came back through a messaging app. Keep the original alongside the working file, check it's the right way up, and make sure a crop hasn't quietly cut off the roofline, the end of the pool or the view you went there to get.
- Use the camera original, or a full-resolution export at high quality.
- Shoot RAW if you can. If not, a clean JPEG with light compression is fine.
- Check the file size, pixel dimensions, orientation and colour before you upload.
- Name the file so the property, the room or angle, and that it's the original are obvious a month later.
- Keep an untouched original, and note which version went in for relighting.
Use the best file the destination and your workflow will take. Relight Spaces accepts a JPG, PNG or HEIC up to 40 MB. Where a platform sets a limit, meet it with a proper export, not a screenshot, a file that's been re-saved five times, or a crop that changes the composition.
Upload, compare and review
In Relight Spaces you upload the daylight file, choose the evening style that suits the house and wait for the result. Then slow down. Open the whole image at delivery size next to the original. Liking the mood is only the first check. Approving it means checking the structure, the surfaces, the reflections and whether the photo is still honest.
- Upload the prepared file: the camera original or your full-resolution export, not a preview saved from a text thread.
- Pick a style: a gentle dusk, a cooler blue hour or a warmer evening, depending on the house and what the photo is for.
- Check at full size: the geometry, frame edges, windows, railings, lights, reflections, pool lines and crop.
- Keep it or reject it: hang on to the original, and reject any result that changes something about the property or leaves something you can't explain.
Upload a daylight photo and look at the evening version next to the original.
Printable field checklist
Go through this on site, then again once the finished image comes back.
Before you leave the scene
- Pick the exterior or interior angle that sells the house
- Set a natural camera height and level the camera
- Keep verticals, rooflines, doors and key edges straight
- Leave usable sky without letting empty sky take over
- Protect the highlights and hold detail in the shadows
- Shoot RAW, or the best full-resolution JPEG available
- Clear the clutter, blocked views and hard-shadow problems
- Switch on the interior, porch, landscape and pool lights where it makes sense
- Check the pools, glass, polished surfaces and other reflections
- Confirm the file size, dimensions, orientation and that the original is kept
Photographing for virtual twilight FAQ
When should I photograph the source frame?
Look for even light you can work with, rather than a particular time. Bright overcast or soft daylight is usually easier to expose consistently. Avoid hard shadows, blown highlights or light that's changing fast enough to hide the house.
Do I need to shoot RAW for virtual twilight?
RAW is the better place to start, because it holds more exposure information for checking and editing. A sharp, well-exposed, full-resolution JPEG that isn't heavily compressed still works fine.
How high should the camera be, and how wide should the lens be?
Aim for a natural, eye-level listing view, keep the camera level, and use the widest focal length that shows the scene without obvious stretching. There's no one right height or lens. The architecture and the crop you want decide it.
Should I turn on the house lights before shooting?
If you can see the fixtures and you're able to control them, switch on the interior, porch, garden and pool lights. That gives the edit real light to work from. Keep it all looking consistent, and avoid colour casts that compete with the house.
How much sky should I leave in the frame?
Leave enough clean sky around the roofline or the outline of the property for the evening look to work, without empty sky taking over. Include the real horizon or landscape when it helps explain the view.
Can virtual twilight fix a bad source photograph?
Not reliably. An edit can change the light and the mood. It can't dependably fix bad blur, blown-out detail, distorted perspective, a house hidden behind something, or a composition that was weak to begin with.